
1. Create your App
Develop the app perfectly to make it ready to be published. Run multiple checks on the app, use proper themes, colours, graphics, icons, optimizations.
2. Generate Signed APK
Signed APK can be generated in the following 2 ways:
a. Using Release Keystore
Release Keystore
To generate keystores for signing Android apps at the command line, use:
keytool -genkey -v -keystore my-key.keystore -alias alias_name -keyalg RSA -keysize 2048 -validity 10000
A debug keystore which is used to sign an Android app during development needs a specific alias and password combination as dictated by Google. To create a debug keystore, use:
keytool -genkey -v -keystore debug.keystore -storepass android -alias androiddebugkey -keypass android -keyalg RSA -keysize 2048 -validity 10000 Keystore name: “debug.keystore” Keystore password: “android” Key alias: “androiddebugkey” Key password: “android”
b. Using Android Studio
Click on the ‘Build’ option from toolbar option and select ‘Generate Signed APK’.
Next, enter your keystore details. Here, you’ll have two options.
1. Choose Existing Keystore
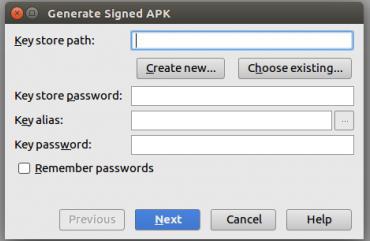
Generate Signed APK
If you’ve already created keystore file, select that keystore file path and enter keystore password, key alias, and key password information.
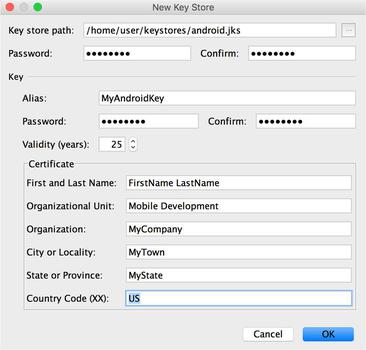
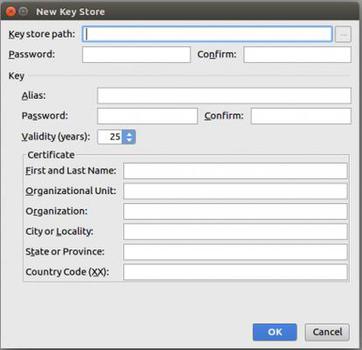
2. Create New Keystore
If you haven’t created a keystore file, then click on create new button.
Once you click on Create new button, it will ask you to define Keystore path and enter following mandatory information.
- Password and Confirm Password
- Key Alias Name
- Key Password and Confirm Password
- First Name and Last Name of your Android app certificate. (certificate name can be your App name or your organization name.)
APK Details
Once you’ve successfully created your Keystore, click on Generate Signed APK. it will ask you to define destination folder of APK. And, while uploading your Android app, remember to select ‘Release Build Type’.
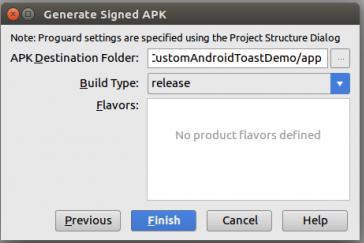
Generate APK
After finishing all process, you’ll get notification as APK Generated Successfully on the top-right corner of Android Studio.
3. Login to your Gmail Account and visit this link :
4. Create a Merchant Account
You’ll need to pay $25 one-time fee for creating developer account. Once you pay the fee and create your Google developer account, login to developer console with the same account.
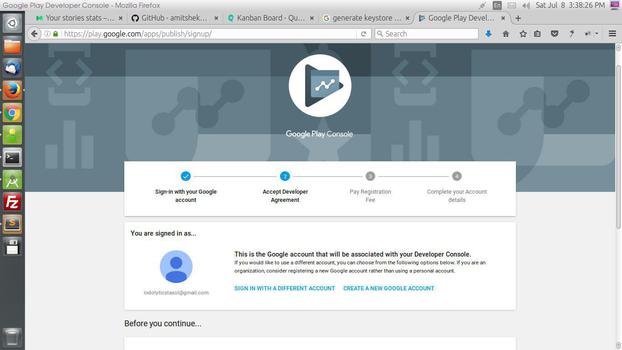
Google Play Console
5. Create New Application and fill details
Click on ‘Create New Application’ located at top right corner of your screen.
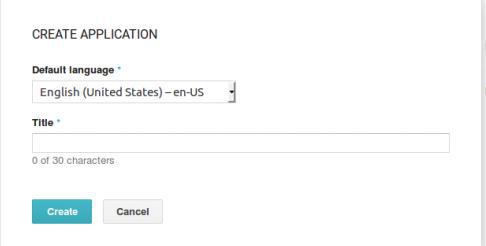
New Application
In the pop-up screen, enter name of your application. You can enter name up to 30 characters for your Android application title.
Next, add description for your Android application. You can enter app description up to 4000 characters in the description field.
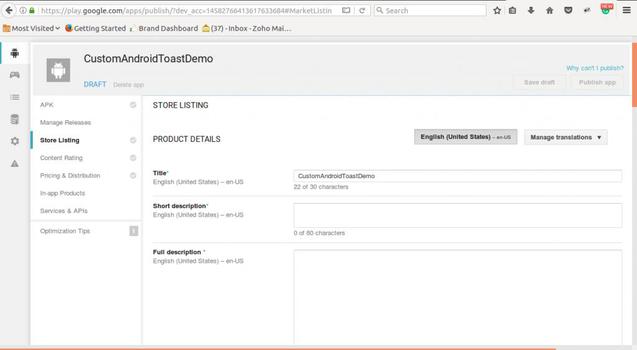
Application Description
Now upload the graphic assets. Here, you’ll be asked to upload different images for your application.
- Screenshots (minimum 2 screenshots are required. Maximum 8 screenshots).
- High resolution icon (512 x 512 32-bit PNG (with alpha))
- Feature Graphic (1024 x 500 h JPG or 24-bit PNG (no alpha))
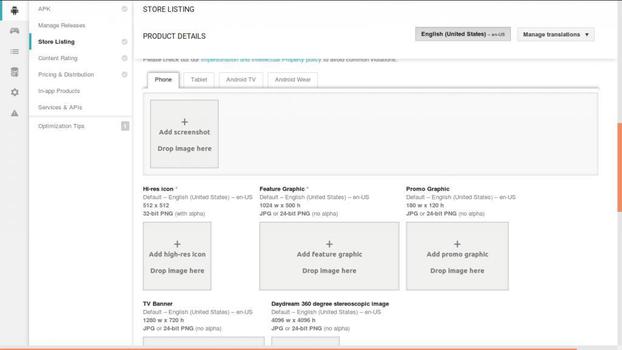
Graphic Assets
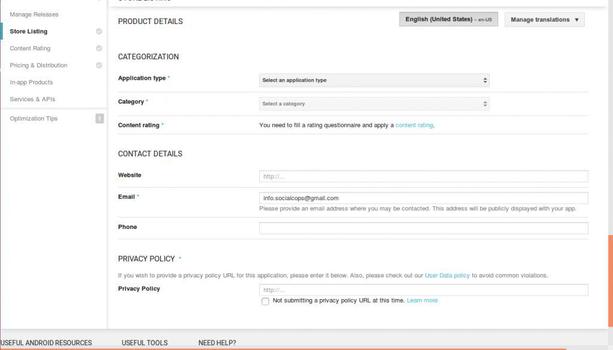
After uploading graphic, select your application category.
- Application
- Games
Application Category
In the next drop down list, select respective category for your Android application.
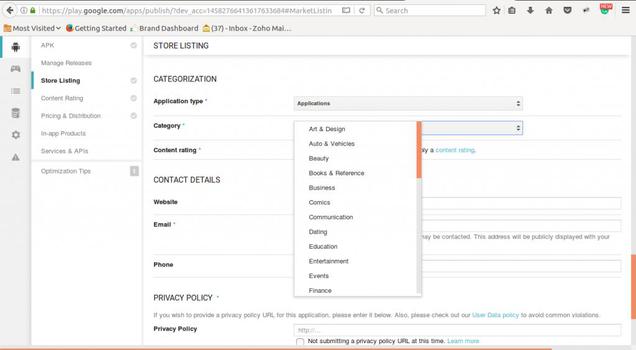
Categories
Next, add privacy policy URL if you’re collecting personal and sensitive information.
Now go to Price & Distribution tab, and choose whether you’re uploading your Android app as free or paid. Also, you can select in which countries your app should be distributed.
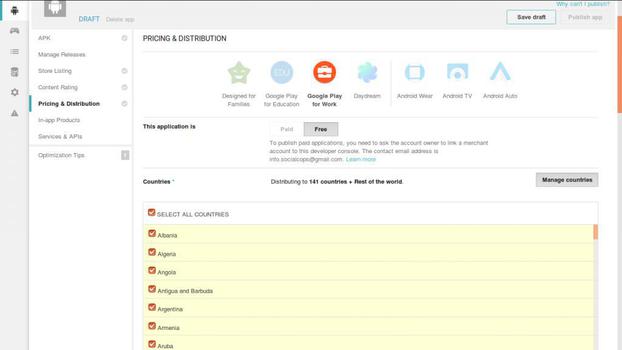
Price and Distribution
You’ll now have to define whether your app contains ads or not. Click on Yes if it’ll have ads.
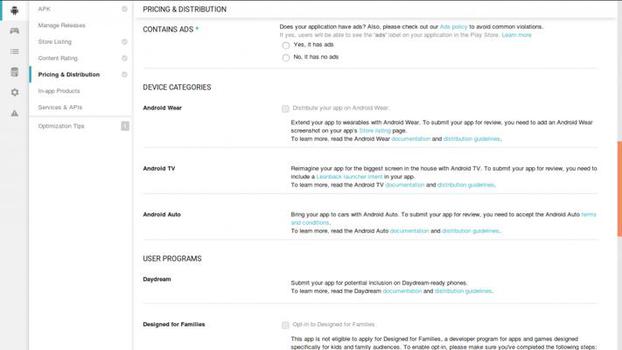
Advertisements
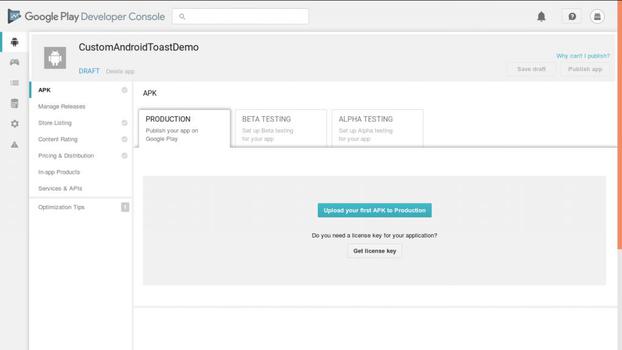
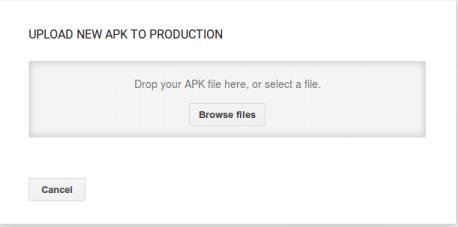
Next, upload your Android application. Click on ‘Upload your first APK to Production’ button. Here, you’ll be asked to upload your APK file. Click on Browse files and select your APK file.
Upload APK
Updated APK into File
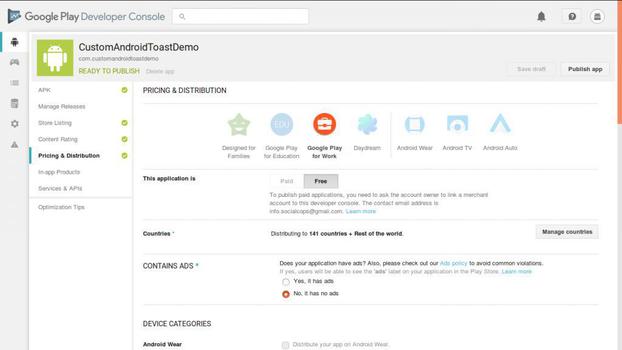
Finally, once you’ve completed all these steps, you’ll see ‘Ready to Publish’ text written on the top-left corner of your screen.
Ready to Publish
Now, just hit the publish button in the Upper Right corner and your Android app will be published!