
This blog will help you get a better idea about how to use the IRIS forms.
Overview
IRIS forms is a feature to allow for IRIS user to roll out forms for surveys and event registrations to any desired demographic pertaining to the college all whilst ensuring that the responses are genuine and authenticated.
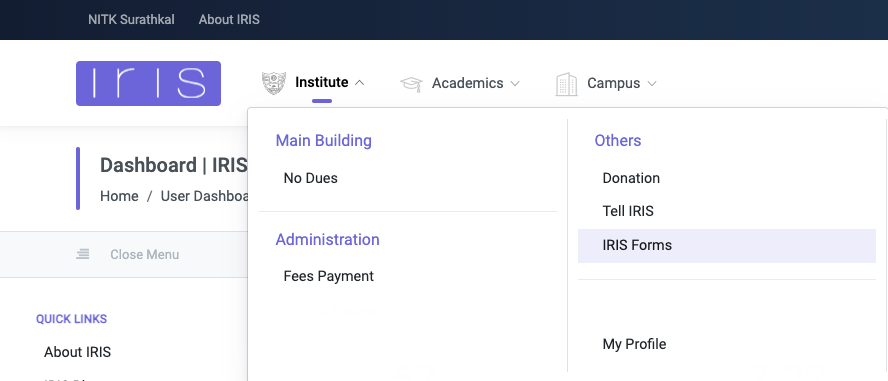
Where to find IRIS forms
Click on the ‘Institute’ drop down button on the top left of your IRIS page and click ‘IRIS Forms’.
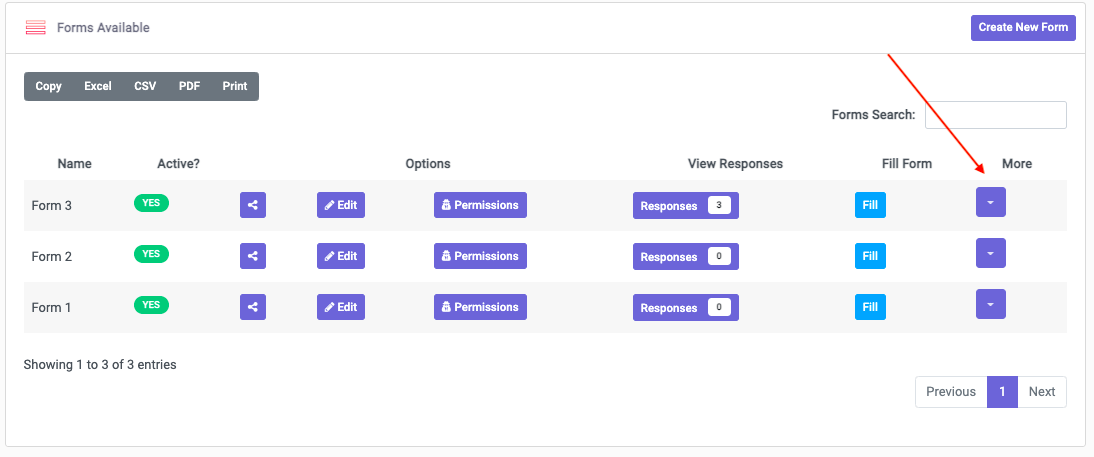
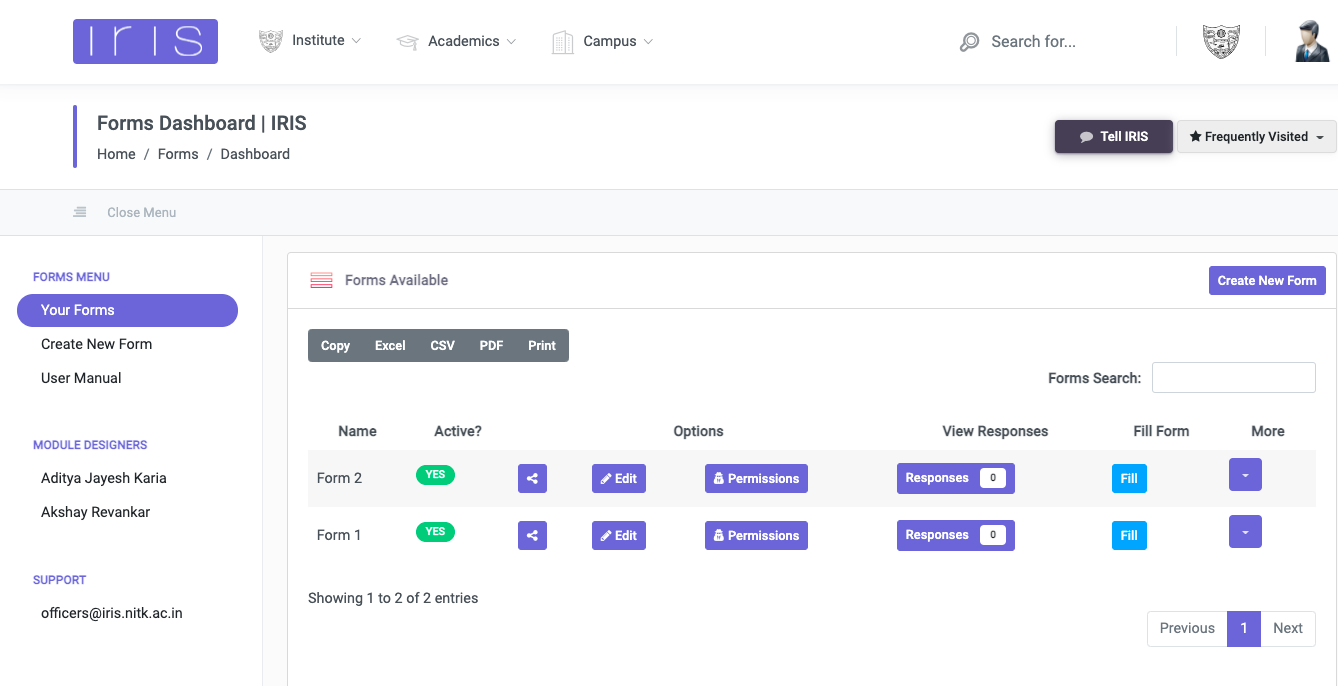
Clicking on IRIS forms will direct you to the Forms Dashboard.
Creating a Form
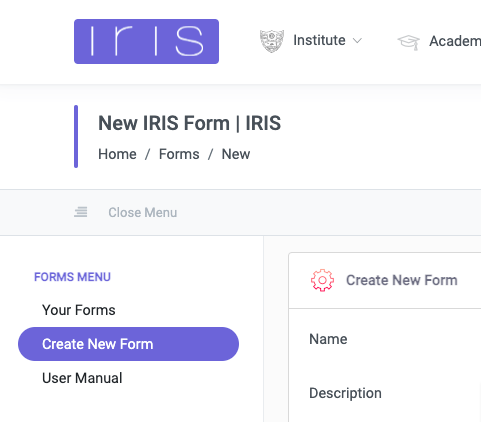
To create a new form, click ‘Create new form’ under the ‘Form Menu’ on the left side of the page.
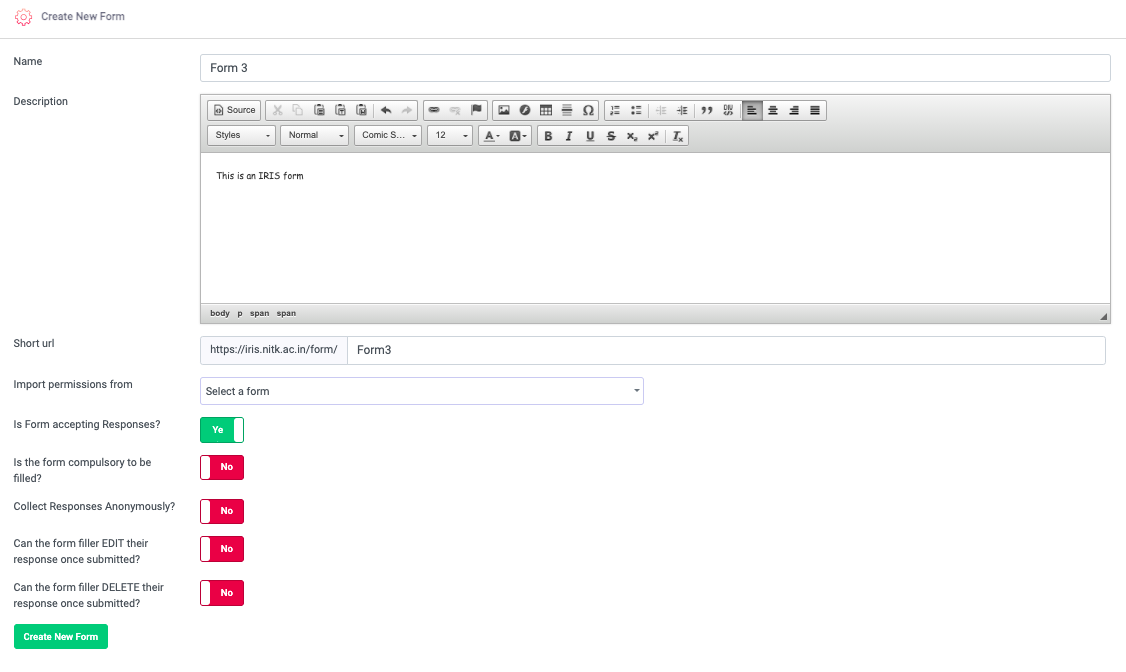
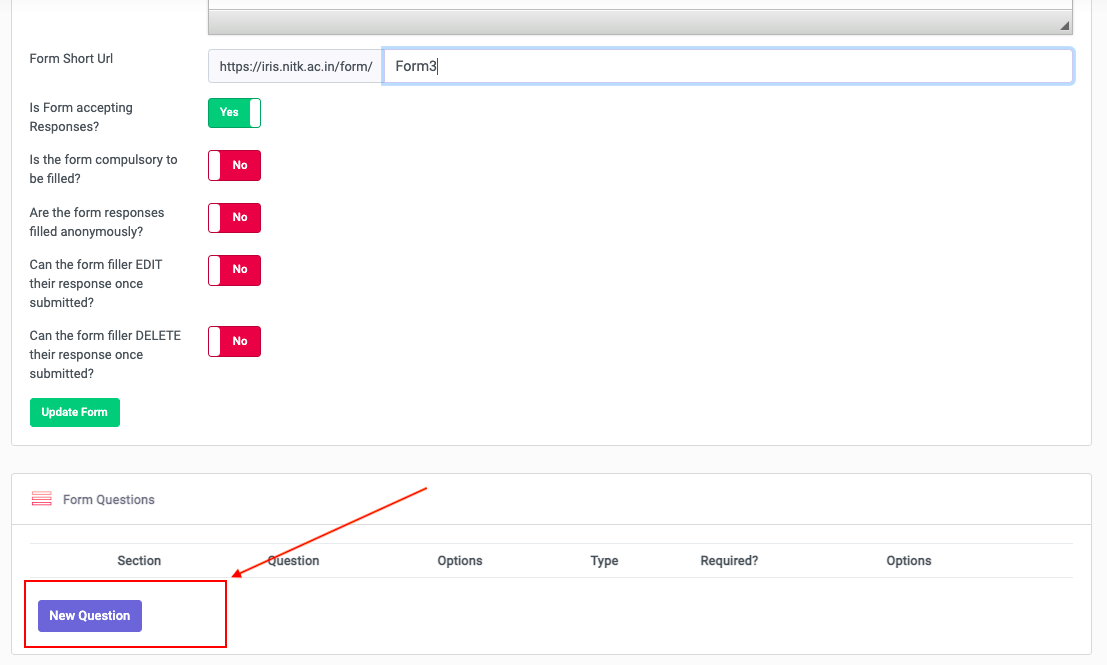
Here you can give your IRIS form a title, description and a short URL to help find the form. You can also set some basic functionalities of the form at that time like whether the person filling the form can delete his or her response, if it is compulsory to fill the form, or if the form can be filled anonymously.
After that click on the ‘Create New Form’ button on the bottom of the page to finish creating the form and to go ahead and add questions.
Now to add a question, click on the ‘New Question’ button on the bottom of the page
When creating a question, you have the option to choose between multiple categories and choose a suitable question form. You may also choose for that particular question to be a compulsory question.
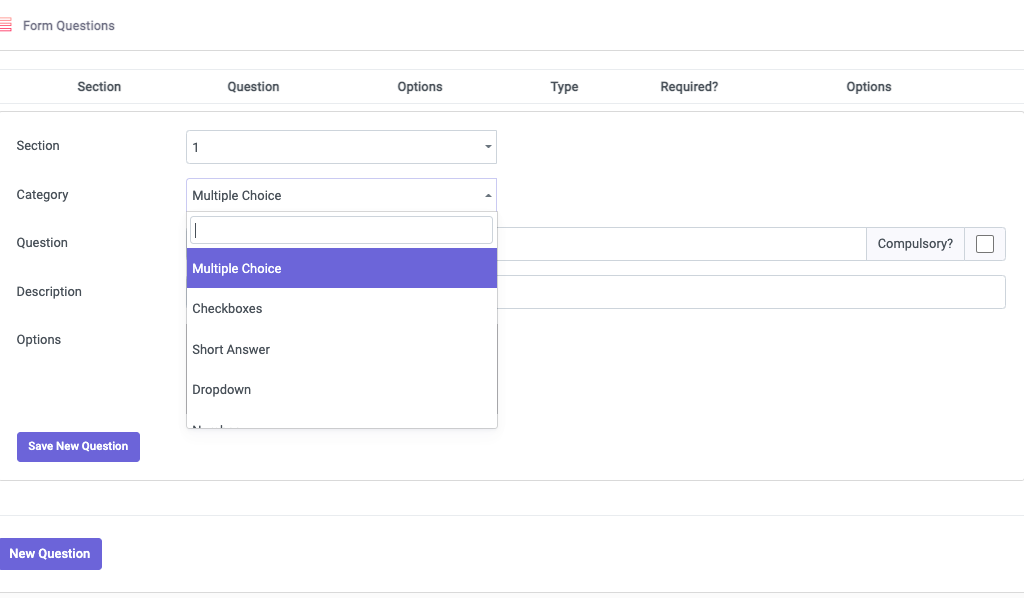
After creating your question, click ‘save’ to save the question and move on to creating more questions.

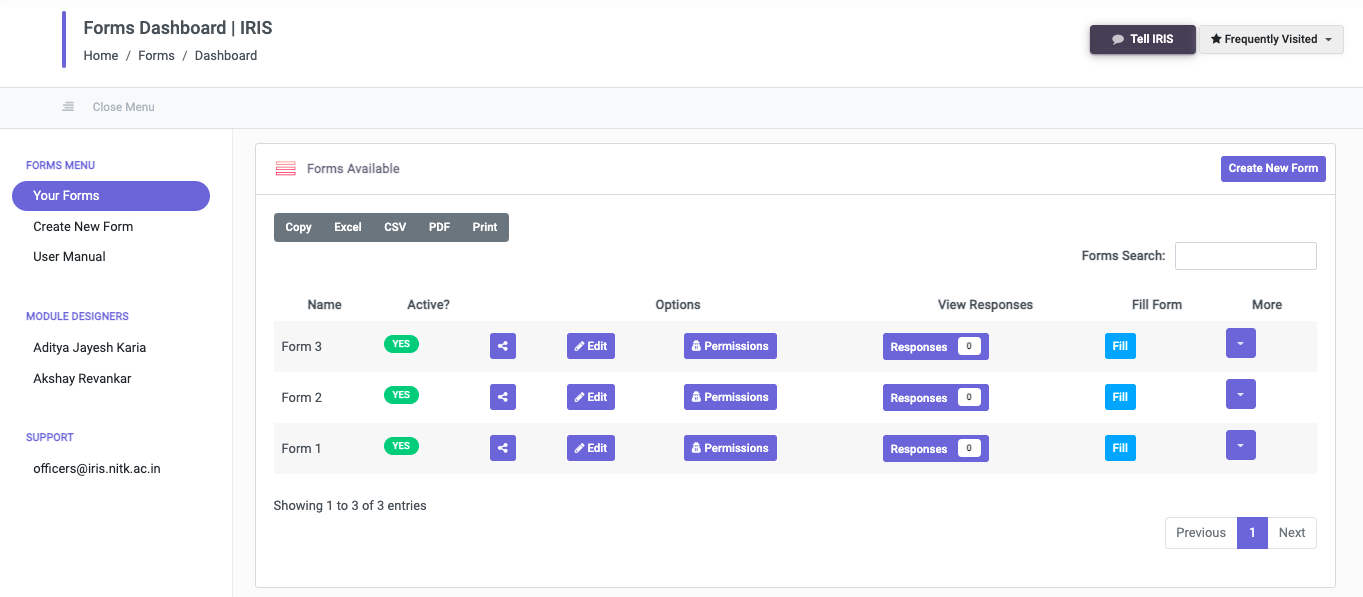
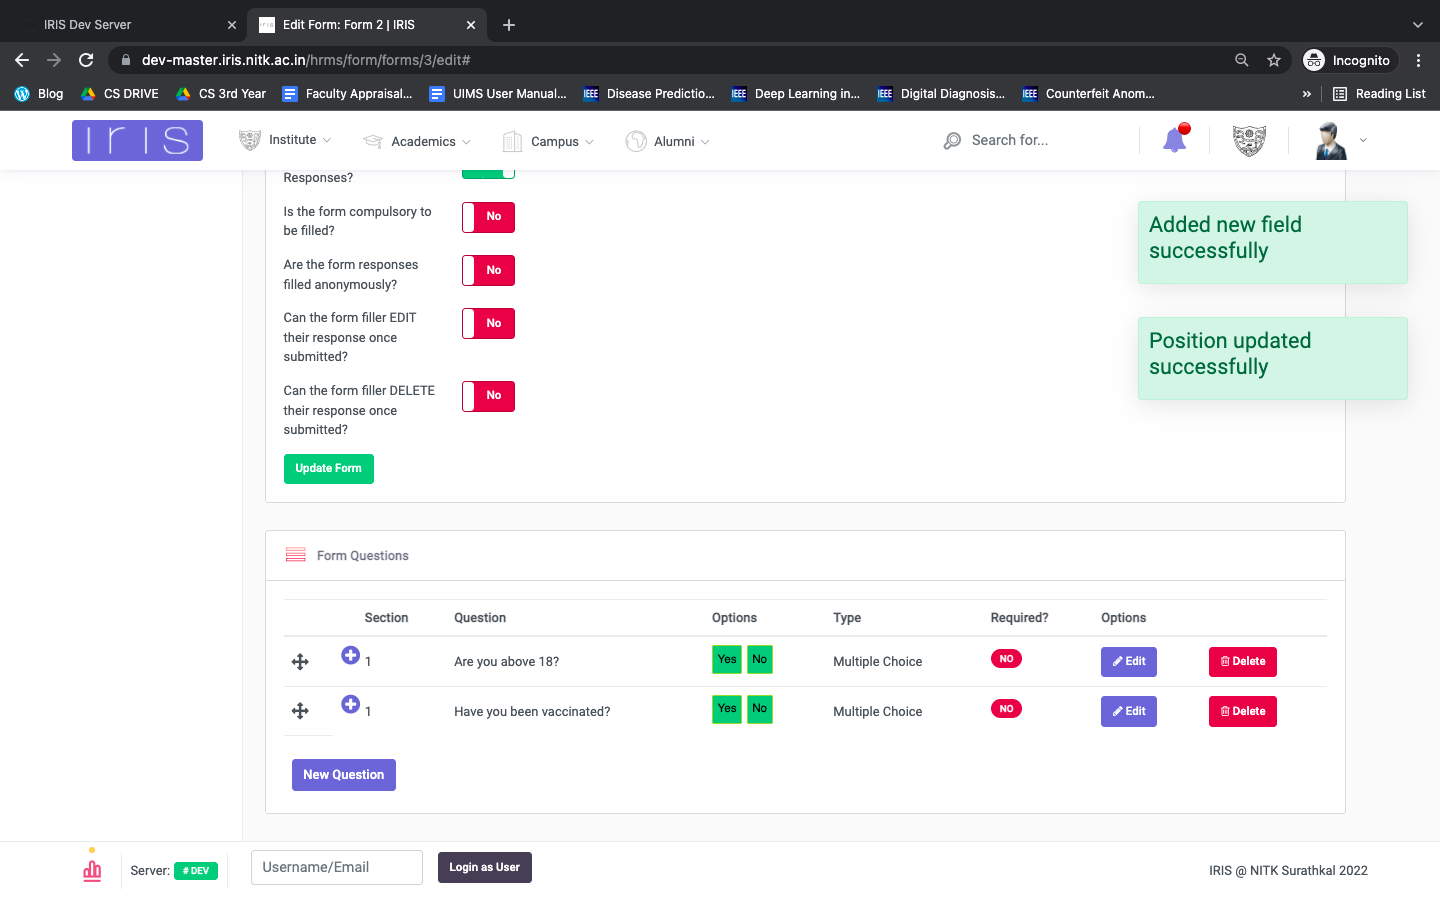
Once you’re done making questions, click ‘Update Form’ and your new form should be visible in ‘Your Forms’ Section.
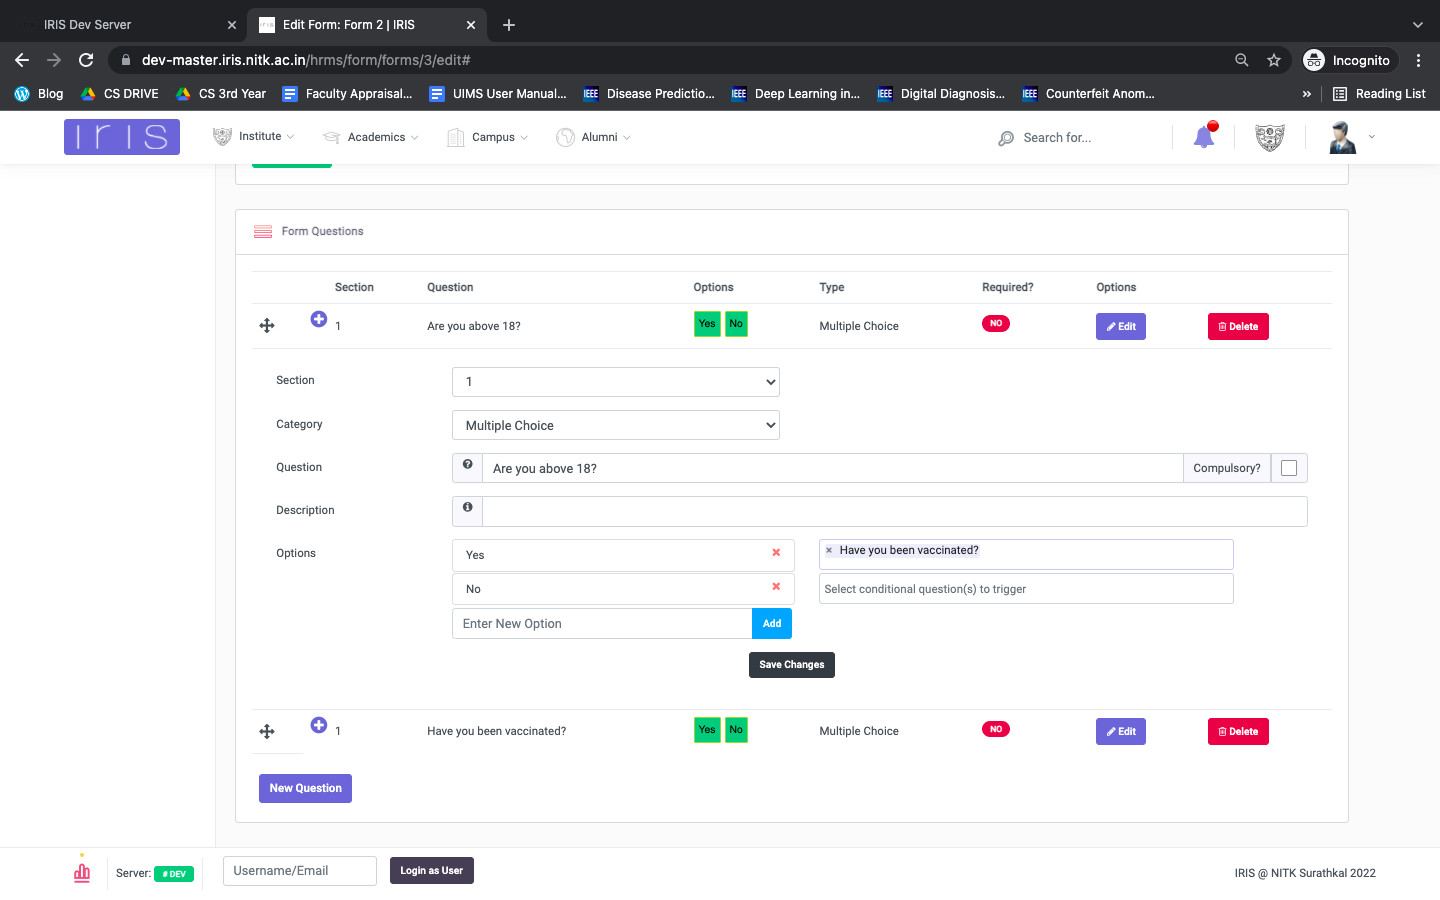
Creating a conditional form
You have the option to create a form, wherein the questions follow a conditional pattern. Based on the answer to one question, another set of questions may show up.
In order to implement this, you must declare all the possible questions beforehand.
After all the questions have been declared, you can edit a question and choose the question that should show up based on one of your answers.
Editing the form
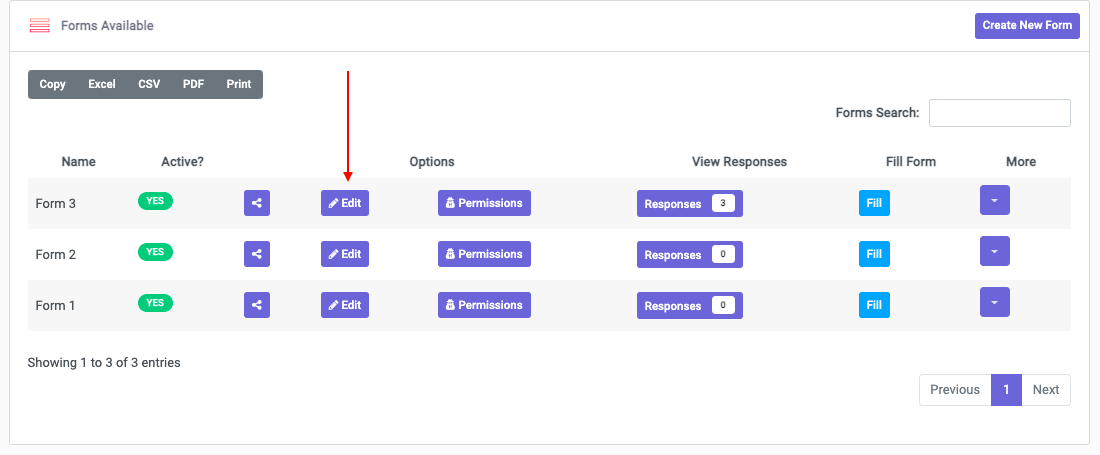
To edit the form, click on the ‘Edit’ button next to the name of the form you want to edit. This will redirect you to a page you’re already familiar with and you can edit existing details, conditions , questions and permissions of the form, or add new ones altogether.
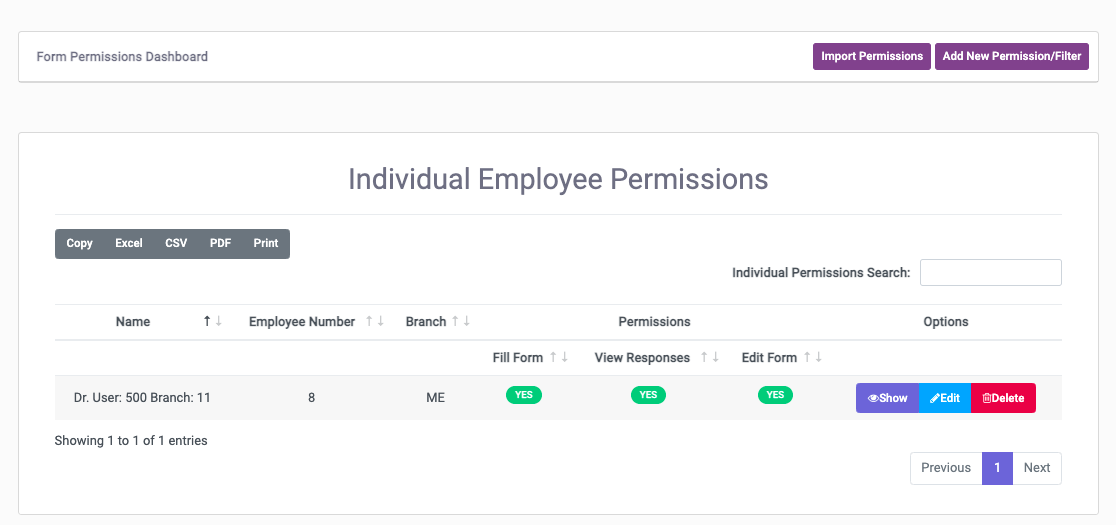
Setting permissions for the form
Deciding who gets to do what with the form is really important. As the creator of the form, you can give permissions to select demographics to either fill, edit or view responses of the form.
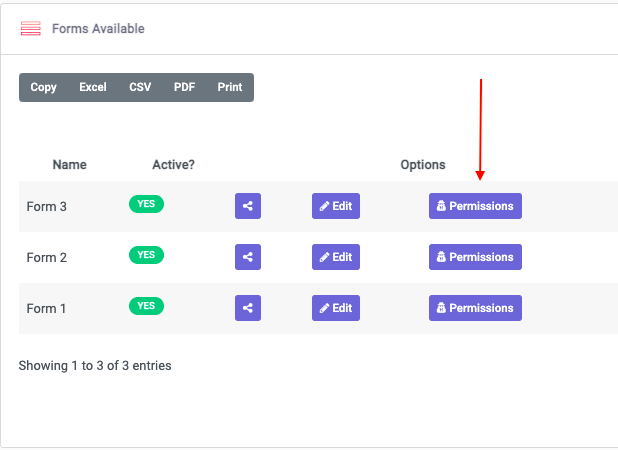
Click on the ‘Permissions’ button, to view the permissions dashboard
Adding a new permission
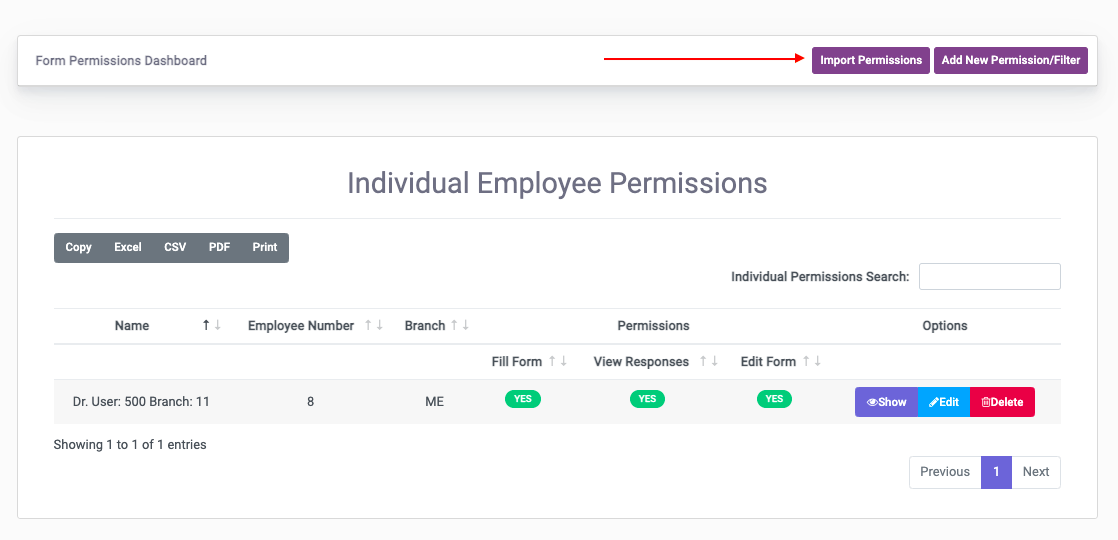
To add a new permission to your form, click on the ‘Add new Permission/Filter’ Button on the top right. This will show you the different type of permissions you can add.
Add Filters to decide who does what. These filters include the permission to :
- Fill a form
- View responses of a form
- Edit a form
The filters can be applied to the follow demographics:
- Students
- Faculty
- Individuals (Based on specification of name / user ID )
- Individuals from an uploaded CSV file
Import Permissions
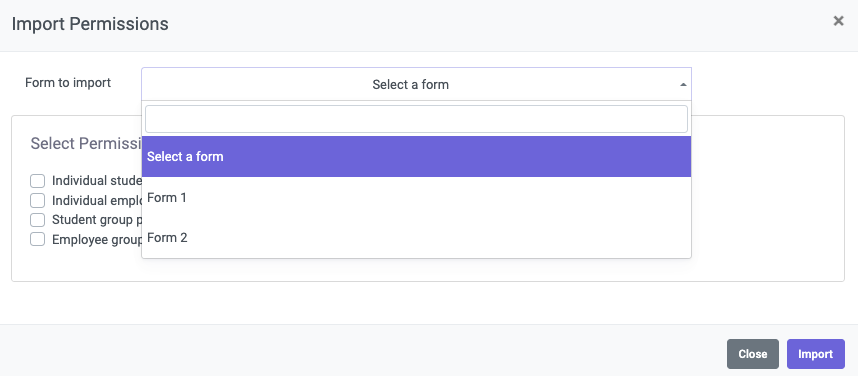
You can also choose to import permissions from an existing form you’ve created before. Click on ‘Import Permission’ and select one of the forms from ‘Form to import’ and then select the type of permission.
Deleting Permissions
To delete permissions, simply click ‘Delete’ next to the permission to delete that particular permission without affecting the others.
Viewing Responses
How to view responses
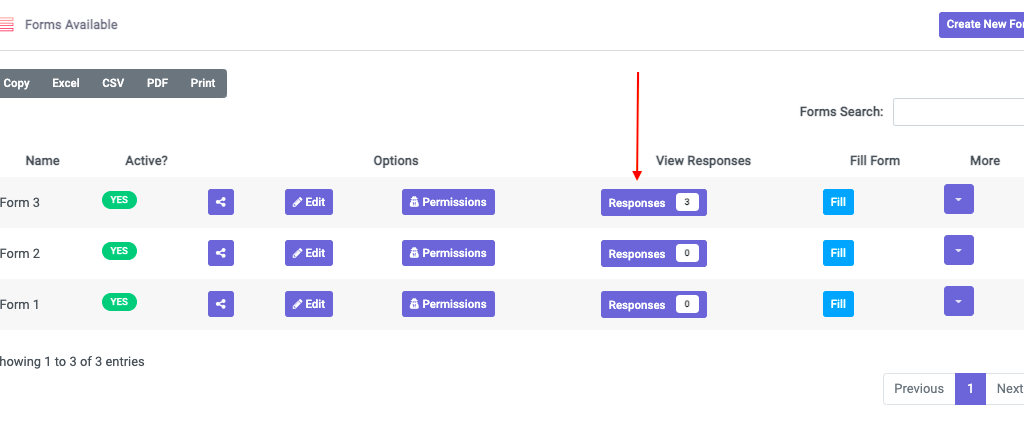
To view responses of one of the forms available in ‘Your Forms’, click the ‘Responses’ button.
You will be able to view a summary of all the responses to the questions in the form, or even view individual responses to each of the questions of the form.
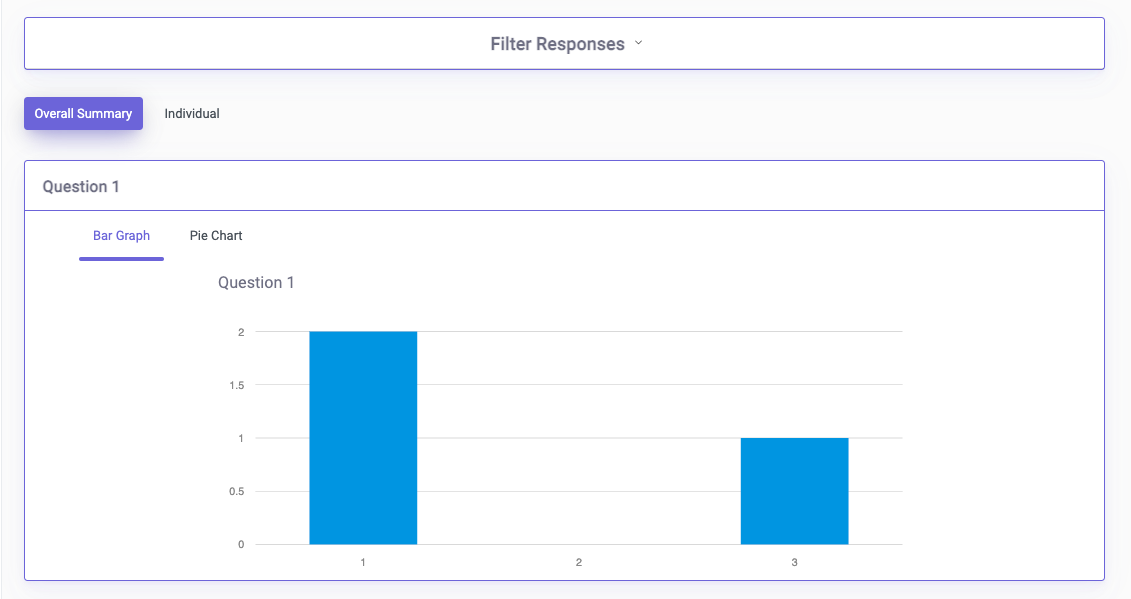
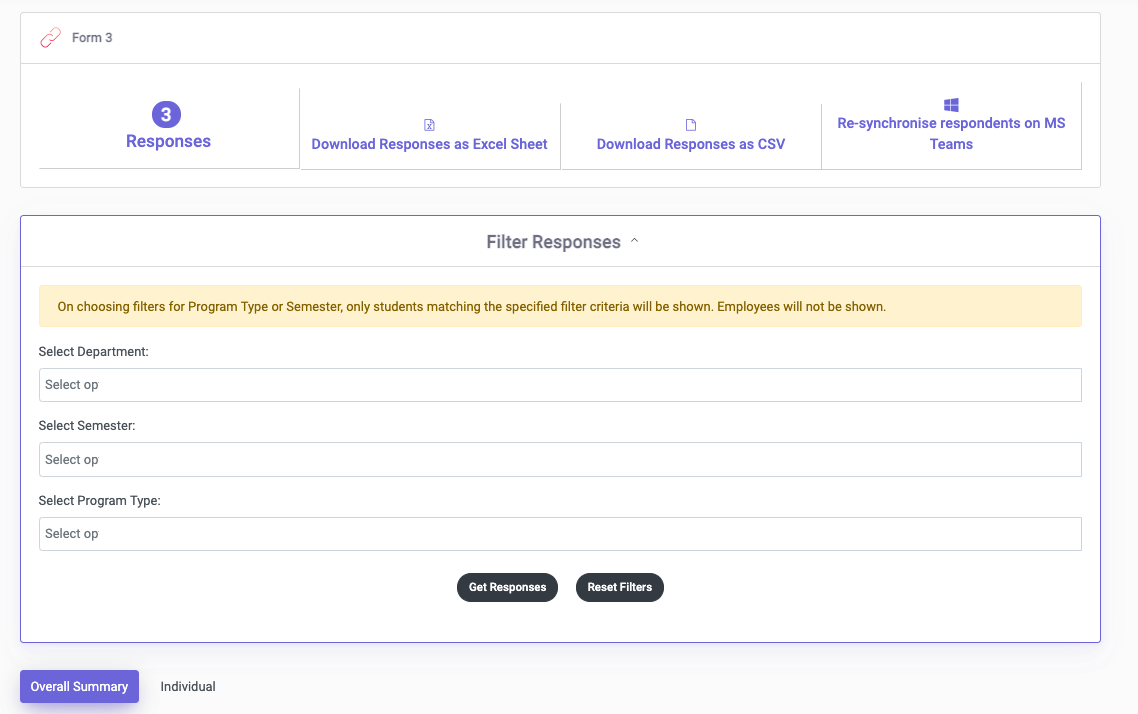
You can filter out the responses based on certain attributes to view only select responses by clicking on ‘Filter Responses’ shown in the above image
Things to do with the responses (Adding respondents directly to Microsoft teams)
Once you have responses for your form, there are a couple of things you can do with the responses. You can download the responses as an excel or as a CSV file.
If you want to add all respondents to a teams channel, you can do that as well. All these options are available on the ‘view responses’ page.

Sharing the IRIS form
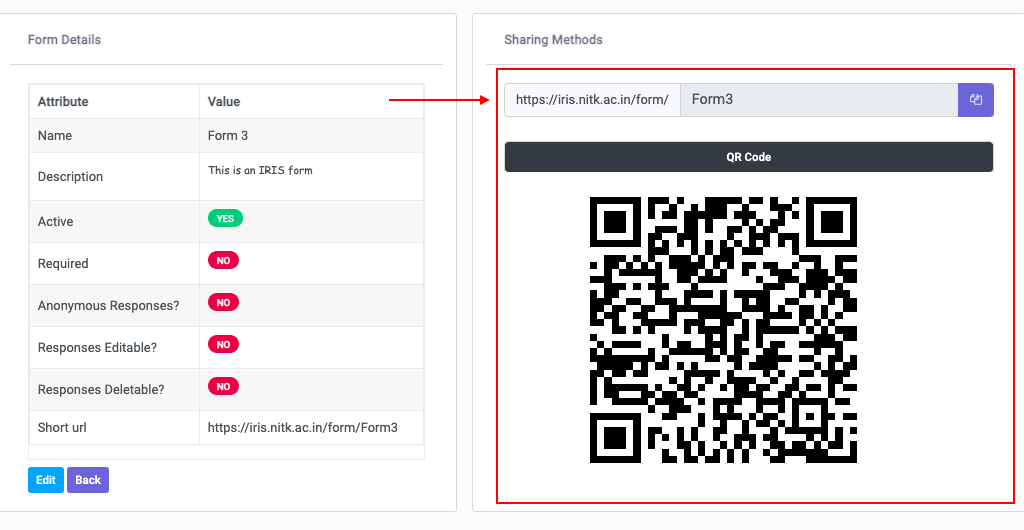
To share the form you’ve created, click on the button pointed to by the red arrow next to the name of the form you want to share.
This will direct you to the page containing details of the short URL, or QR code that you can share with those who need to fill the form

Deleting an IRIS form
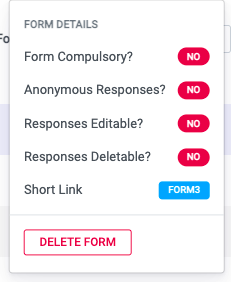
To delete a form, click on ‘More’ next to the name of the form you want to delete and click ‘DELETE FORM’